Hexo + Github Actions 实现自动部署
本篇教程为源码与网页同仓库方案
源码与渲染后的博客静态页面放在同一个仓库的不同分支, 以 Hexo 分支为源码,master 分支为渲染后的静态页面
准备工作
- 简单了解 Hexo,GitHub Actions 以及 Github Secrets
- 安装 Hexo
- 熟练使用 Baidu 或 Bing 大小姐
创建仓库
- 创建名称为
username.github.io的仓库
使用 GitHub Actions 部署到 Github Pages 时,存放部署网站静态文件的仓库名必须为 username.github.io ,这与 Github Page 的配置有关,部署后将得到一个名为:https://username.github.io 的网站
如果 Hexo 根目录还没有仓库,执行以下指令新建并上传到 GitHub
1
2
3
4
5
6
git init
git add .
git commit -m "first commit"
git branch -M master
git remote add origin https://github.com/username/username.github.io.git
git push -u origin master新建并转到 hexo 分支,再将新创建的分支信息推送到 Github
1
2
git checkout -b Hexo
git push origin HEAD -u推送后仓库中有两个分支,一个为默认的 master 分支,另一个新建的 hexo 分支,之后 hexo deploy 部署的静态页面会覆盖 master 分支中的文件,这样 master 分支中就是最后
/public下的静态页面
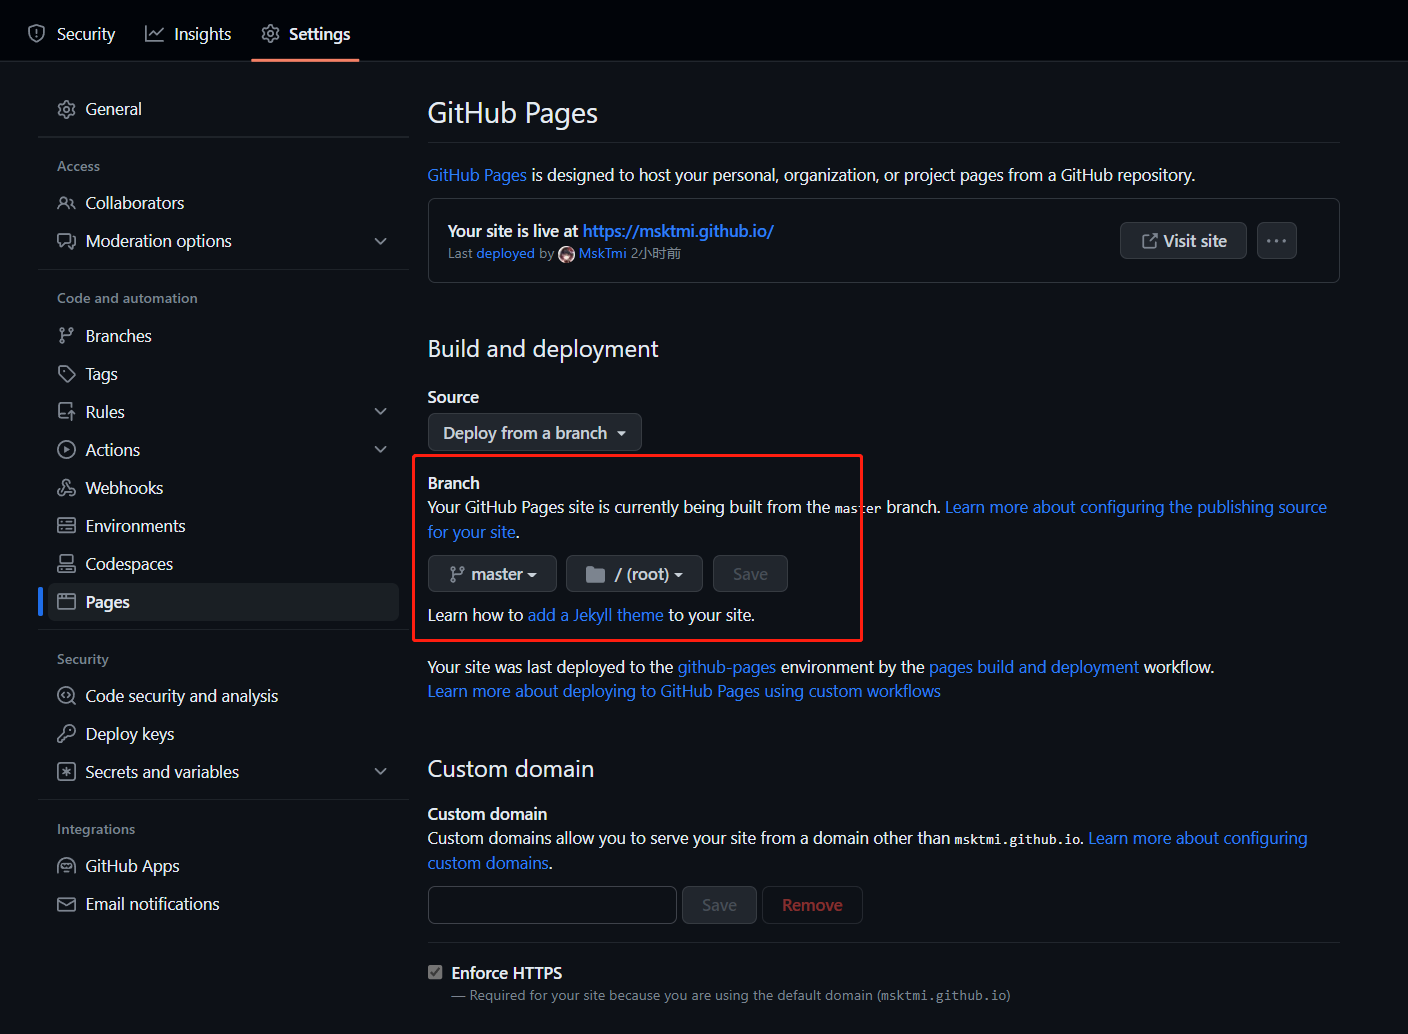
设置 GitHub Pages
将 GitHub Pages 绑定到 master 分支
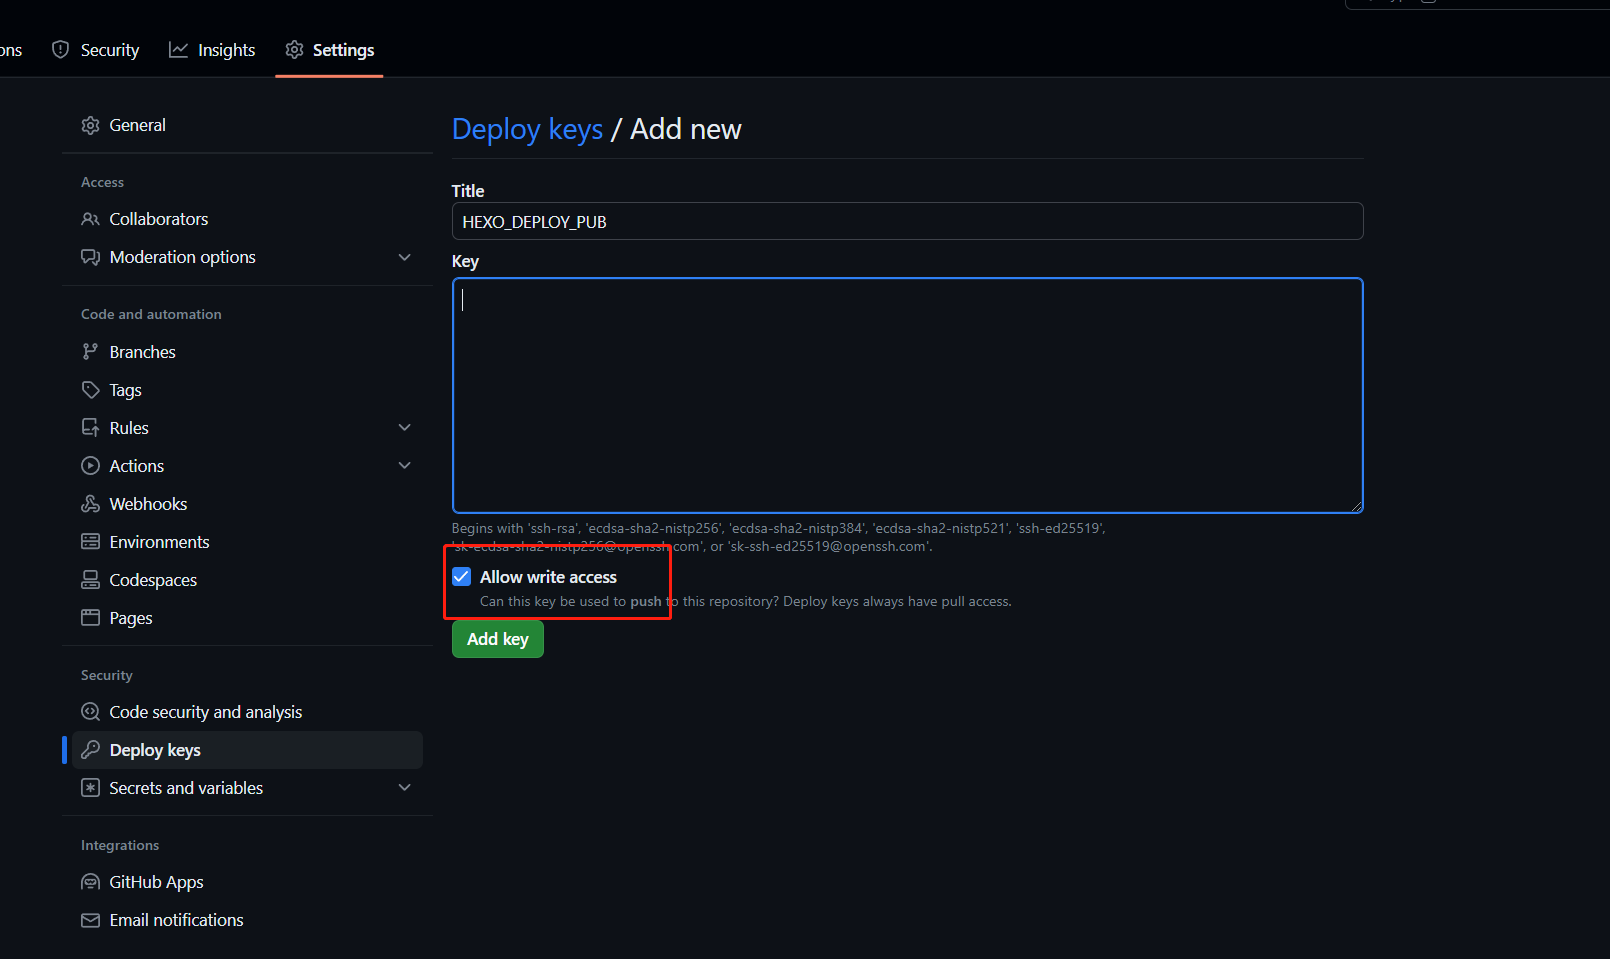
配置部署密钥(Deploy keys)
即授予对单个存储库的访问权限的 SSH 密钥
生成 ssh key
已绑定公钥请跳过这一步,该命令会覆盖旧的密钥
在控制台中输入
ssh-keygen -t rsa -C "[email protected]"执行后一直回车即可,该命令会将密钥默认添加在 C 盘的用户目录中
按下 win + r 输入
%UserProfile%\.ssh,打开 C 盘用户目录中密钥所在的.ssh文件夹.ssh文件夹下的id_rsa.pub文件为公钥,id_rsa文件为私钥
添加公钥
- 打开
username.github.io仓库中的 Setting 并找到 Deploy keys 选项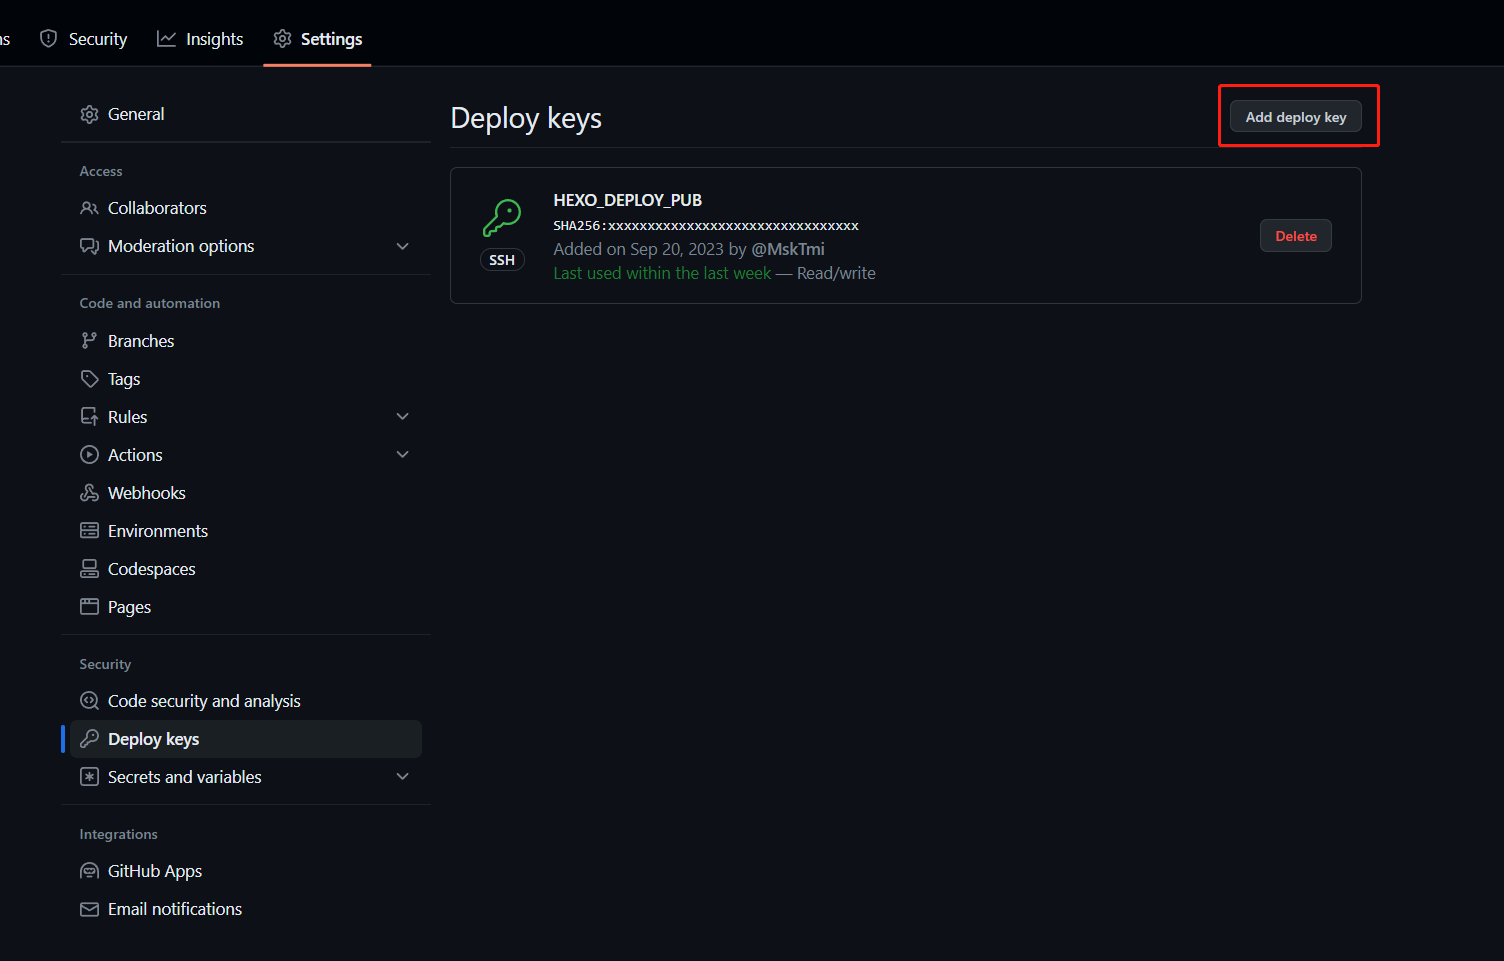
- 在 Title 中填写
HEXO_DEPLOY_PUB作为公钥名,并将id_rsa.pub中的内容复制到 key 中 - 勾选
Allow write access后点击添加
配置秘密变量(GitHub Secrets)
借助密钥可以在组织、存储库或存储库环境中存储敏感信息。
在下一步的 GitHub 工作流配置中需要添加私钥来完成推送,但由于 GitHub 工作流配置文件是公开的,我们不能将私钥暴露在互联网中,所以需要添加秘密变量来隐藏私钥
添加私钥
- 继续在 Setting 中找到 Secrets and variables\Actions 选项
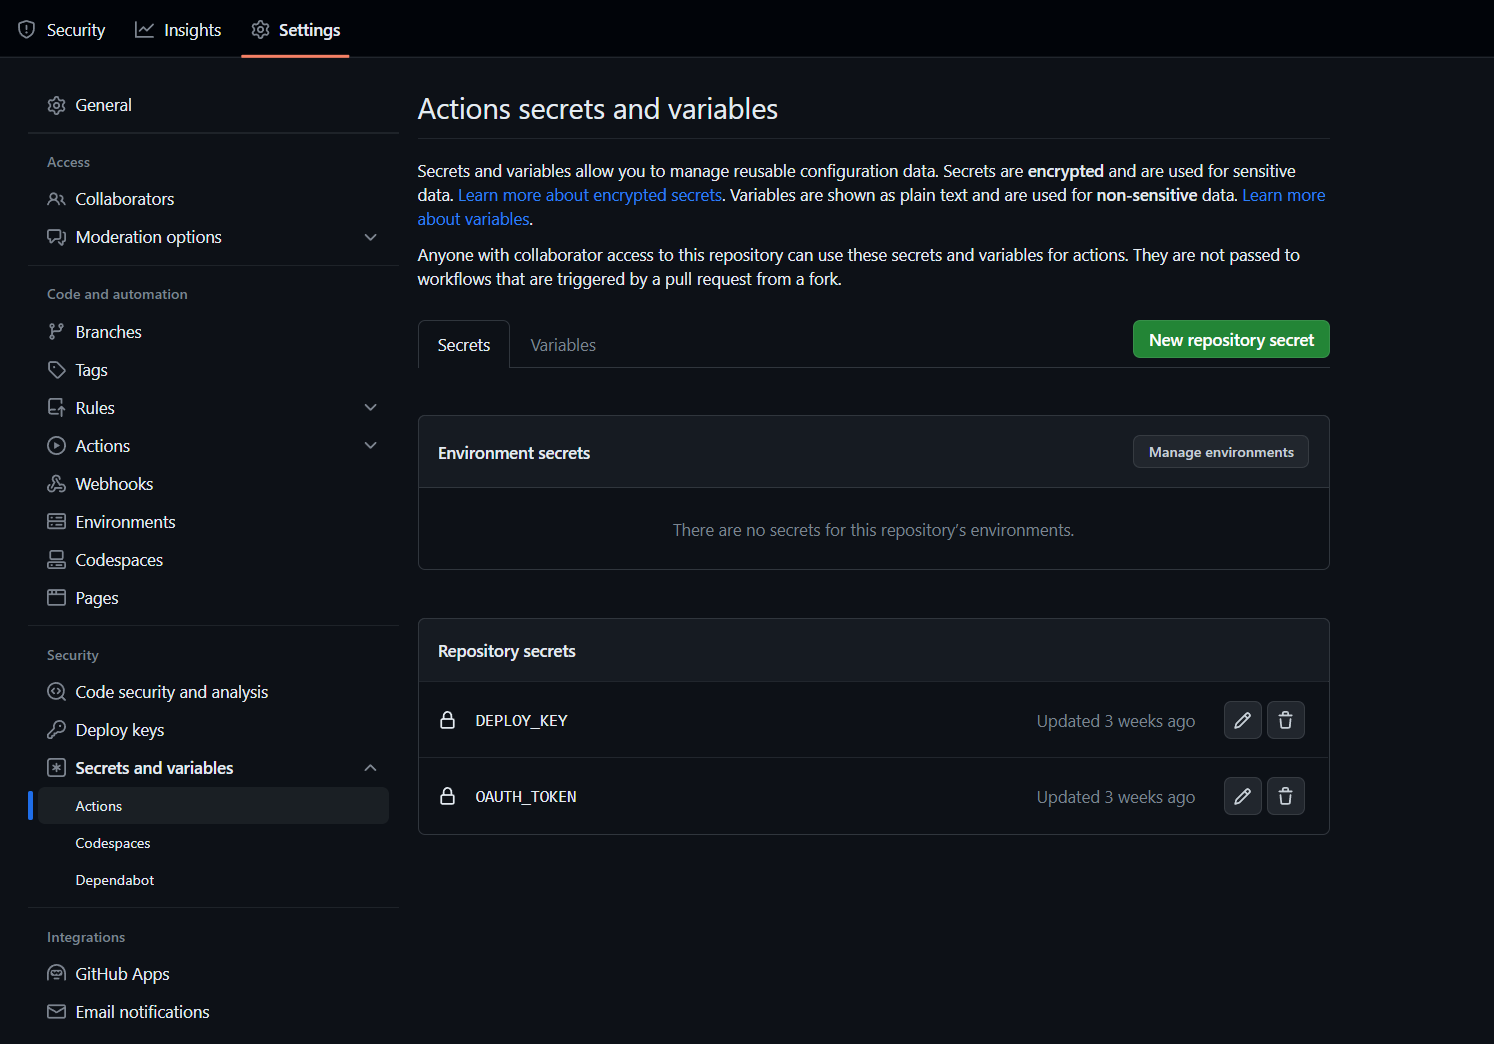
- 在 Name 中填写
DEPLOY_KEY作为私钥名,并将id_rsa中的内容复制到 Secret 中
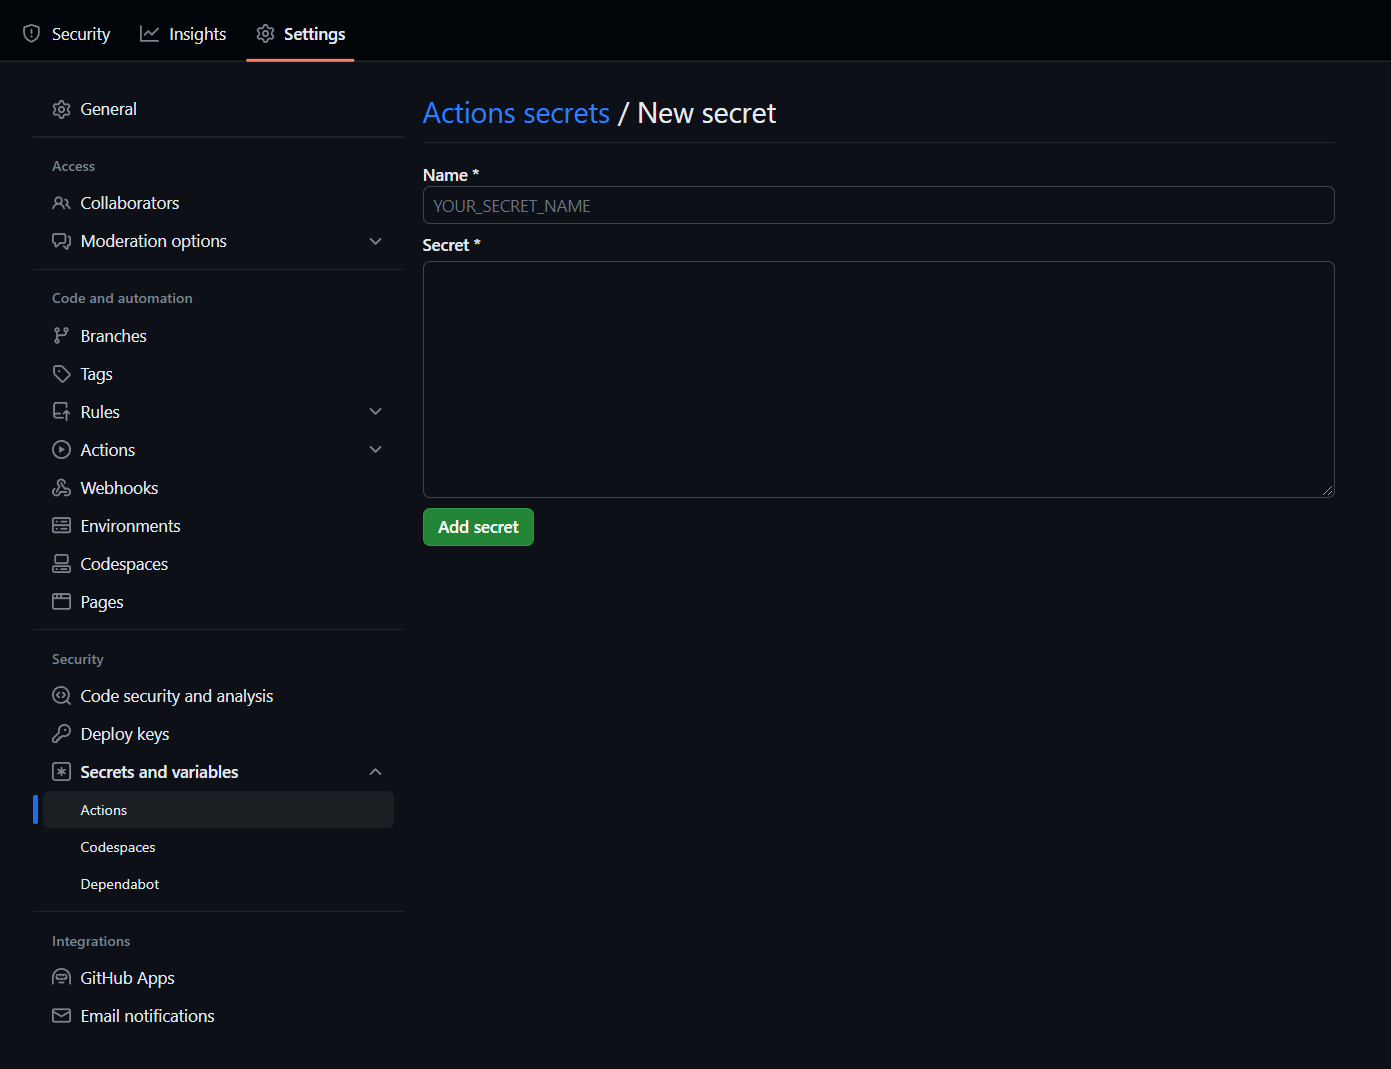
Name 为秘密变量名,Secret 为秘密变量的值
* 其他插件
也可将博客配置文件中的敏感信息替换为秘密变量,例如:密钥,API 等
这里以配置 Gitalk 为示例:
- 将
_config.butterfly.yml中 Gitalk 所需的 client_secret 值改为秘密变量1
2
3
4
5
6
7
8
9# gitalk
# https://github.com/gitalk/gitalk
gitalk:
client_id: xxxxxxxxxxxxx
client_secret: OAUTH_TOKEN # 使用GitHub Secrets
repo: username.github.io
owner: username
admin: username
option: - 在项目仓库的 Setting\Secrets and variables\Actions 中添加 Name 为 OAUTH_TOKEN 的秘密变量
- 在 HexoCl.yml 中添加
1
2
3
- name: Replace secrets
run: |
sed -i 's/OAUTH_TOKEN/${{ secrets.OAUTH_TOKEN }}/' ./_config.butterfly.yml以上流程可以将
_config.butterfly.yml文件中的OAUTH_TOKEN字符替换为${{ secrets.OAUTH_TOKEN }}变量的值
GitHub 工作流配置
在 Hexo 目录或 GitHub 中新建
.github/workflows/目录,目录中新建HexoCI.yml文件
这里给一个示例 GitHub 工作流配置的方式可查阅 GitHub 官方文档说明编写
HexoCI.yml工作流配置(大部分可直接 copy)1
2
3
4
5
6
7
8
9
10
11
12
13
14
15
16
17
18
19
20
21
22
23
24
25
26
27
28
29
30
31
32
33
34
35
36
37
38
39
40
41
42
43
44
45
46
47
48
49
50
51
52
53
54
55
56
57name: CI
on:
push:
branches: [ "Hexo" ] #源码分支名
jobs:
build:
runs-on: ubuntu-latest
name: 自动部署Hexo
steps:
- name: 检查分支
uses: actions/checkout@v2
with:
ref: Hexo
- name: 安装 Node.js
uses: actions/[email protected]
with:
node-version: "16.x"
- name: 安装 Hexo
run: |
npm install hexo-cli -g --save
- name: 缓存 node-modules
id: cache-npm
uses: actions/cache@v3
env:
cache-name: cache-node-modules
with:
path: node_modules
key: ${{ runner.os }}-build-${{ env.cache-name }}-${{ hashFiles('**/package-lock.json') }}
restore-keys: |
${{ runner.os }}-build-${{ env.cache-name }}-
${{ runner.os }}-build-
${{ runner.os }}-
- name: 安装依赖
if: ${{ steps.cache-npm.outputs.cache-hit != 'true' }}
run: |
npm install --save
- name: 配置环境 #记得修改 email 和 name
env:
DEPLOY_KEY: ${{ secrets.DEPLOY_KEY }} #这里的 "DEPLOY_KEY" 是之前设置秘密变量的名字
run: |
mkdir -p ~/.ssh/
echo "$DEPLOY_KEY" > ~/.ssh/id_rsa
chmod 600 ~/.ssh/id_rsa
ssh-keyscan github.com >> ~/.ssh/known_hosts
git config --global user.email "useremail"
git config --global user.name "username"
ssh-keygen -y -f ~/.ssh/id_rsa
- name: 部署 Hexo
run: |
hexo clean
hexo d
Hexo 配置
- 安装 hexo-deployer-git
npm install hexo-deployer-git --save - 在项目根目录中修改 _config.yml ,增加部署相关内容:
1
2
3
4
deploy:
type: git
repo: [email protected]:username/username.github.io.git
branch: master这里的 repox 需要填写 ssh 的形式
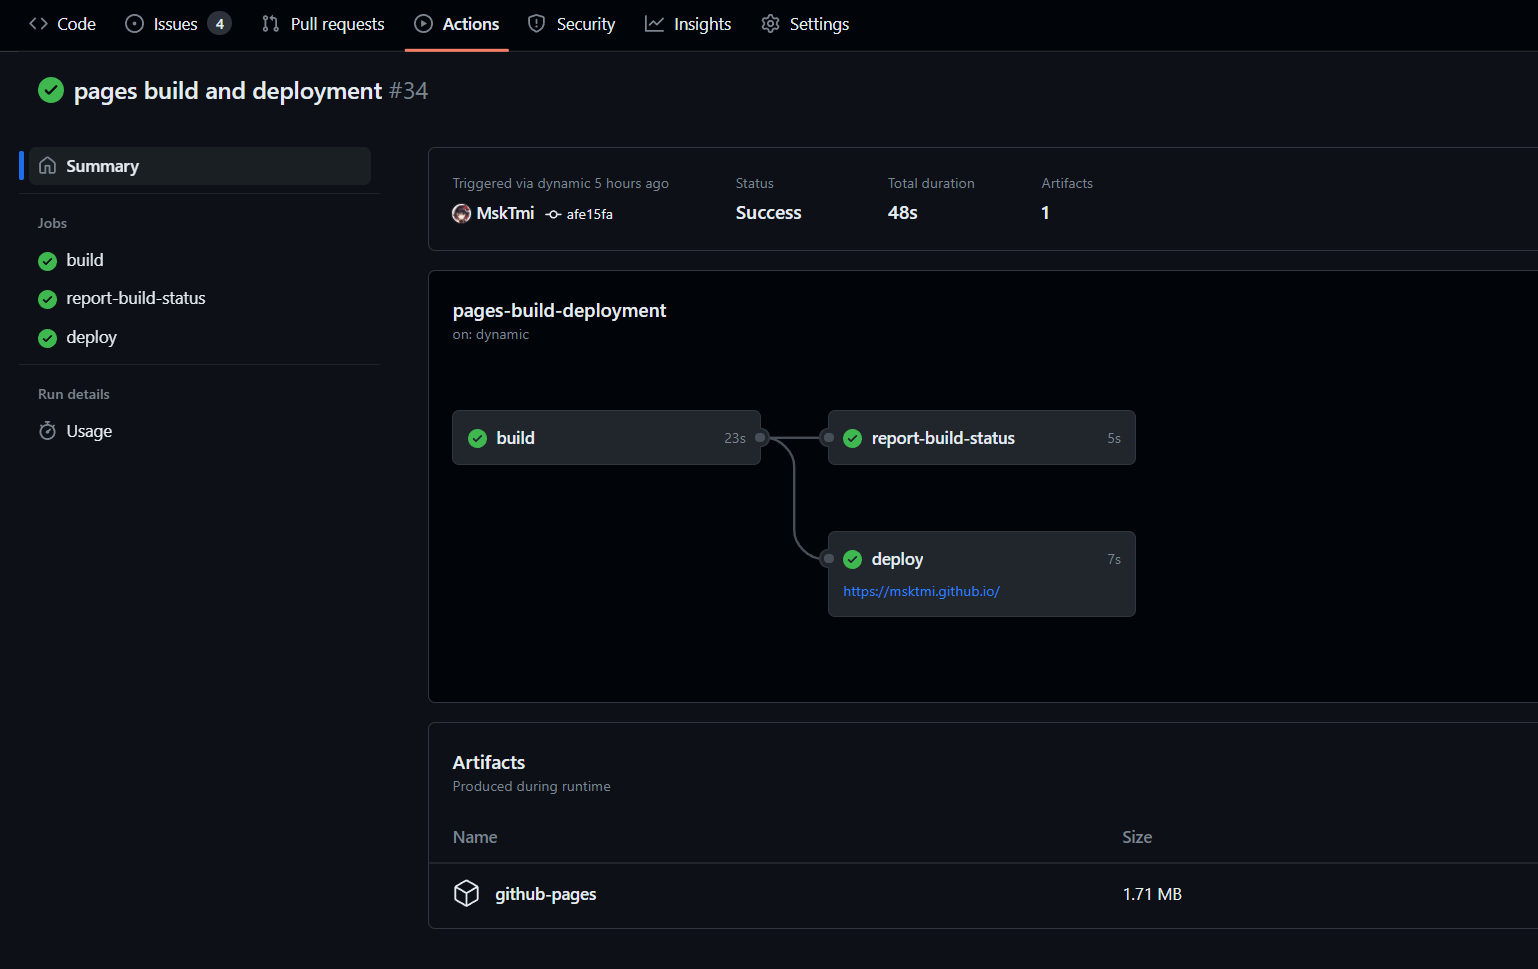
查看结果
最后只需要在 Hexo 分支上推送代码即可自动部署博客,执行过程可以在 Actions 中查看
完成后直接访问 https://username.github.io 查看博客